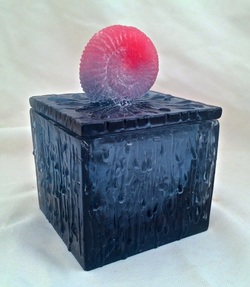
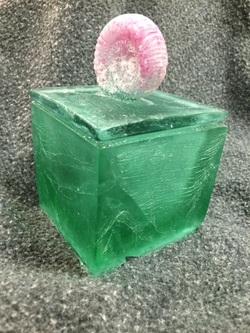
We are proud of ourselves- this cast glass box is really beautiful! The blue glass box and top both have a watery, dripping effect, and the pink cast glass shell on top turned out perfect. Tom is making a walnut base with wavy, curvy legs for it, and it's gorgeous. We're almost ready to start casting in lead crystal.
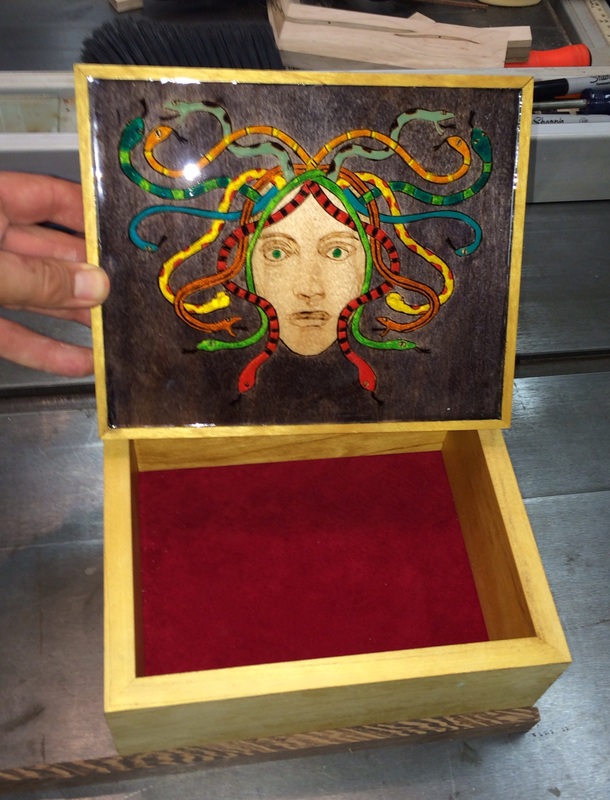
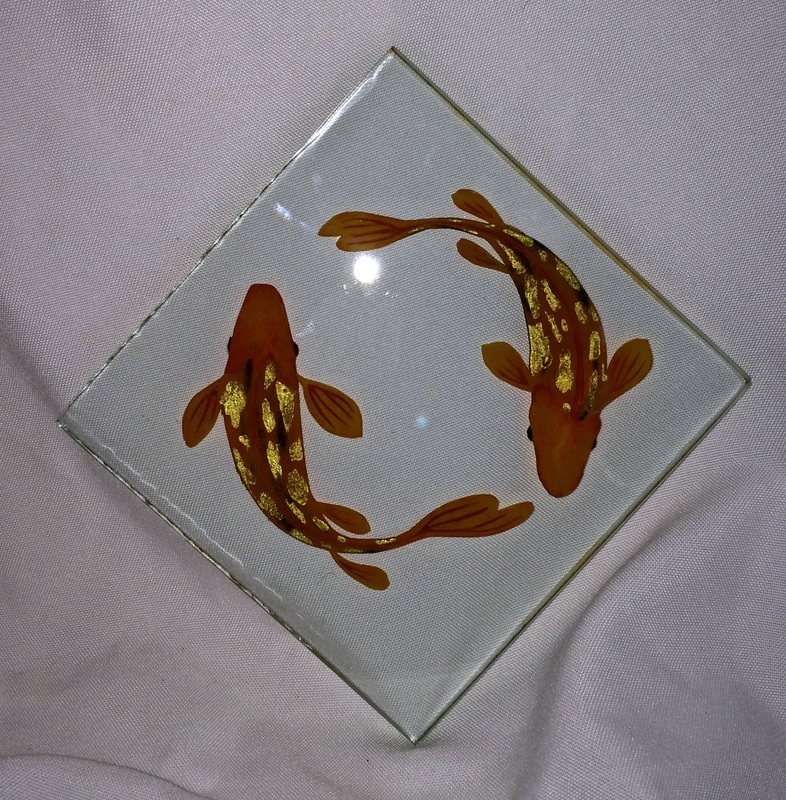
Below, a Medusa box. Medusa and snakes are woodburned and painted. The sides are yellowheart. The inside is lined with red suede, and it will be hinged. Next to it, a new etched, goldleafed, and painted glass for a box top- two koi. They were etched into the glass, then goldleafed in spots, then painted with enamel paint in the etch. This will get a watery colored painted base.
Below, a Medusa box. Medusa and snakes are woodburned and painted. The sides are yellowheart. The inside is lined with red suede, and it will be hinged. Next to it, a new etched, goldleafed, and painted glass for a box top- two koi. They were etched into the glass, then goldleafed in spots, then painted with enamel paint in the etch. This will get a watery colored painted base.
| 
|
 RSS Feed
